3DCoat Monke Head Workflow
Sup duders. This blog will act as a semi private journal of my 3D/2D art investigation, as well as rambling long winded notes so that I can come back later if I need to refresh myself on a thing.
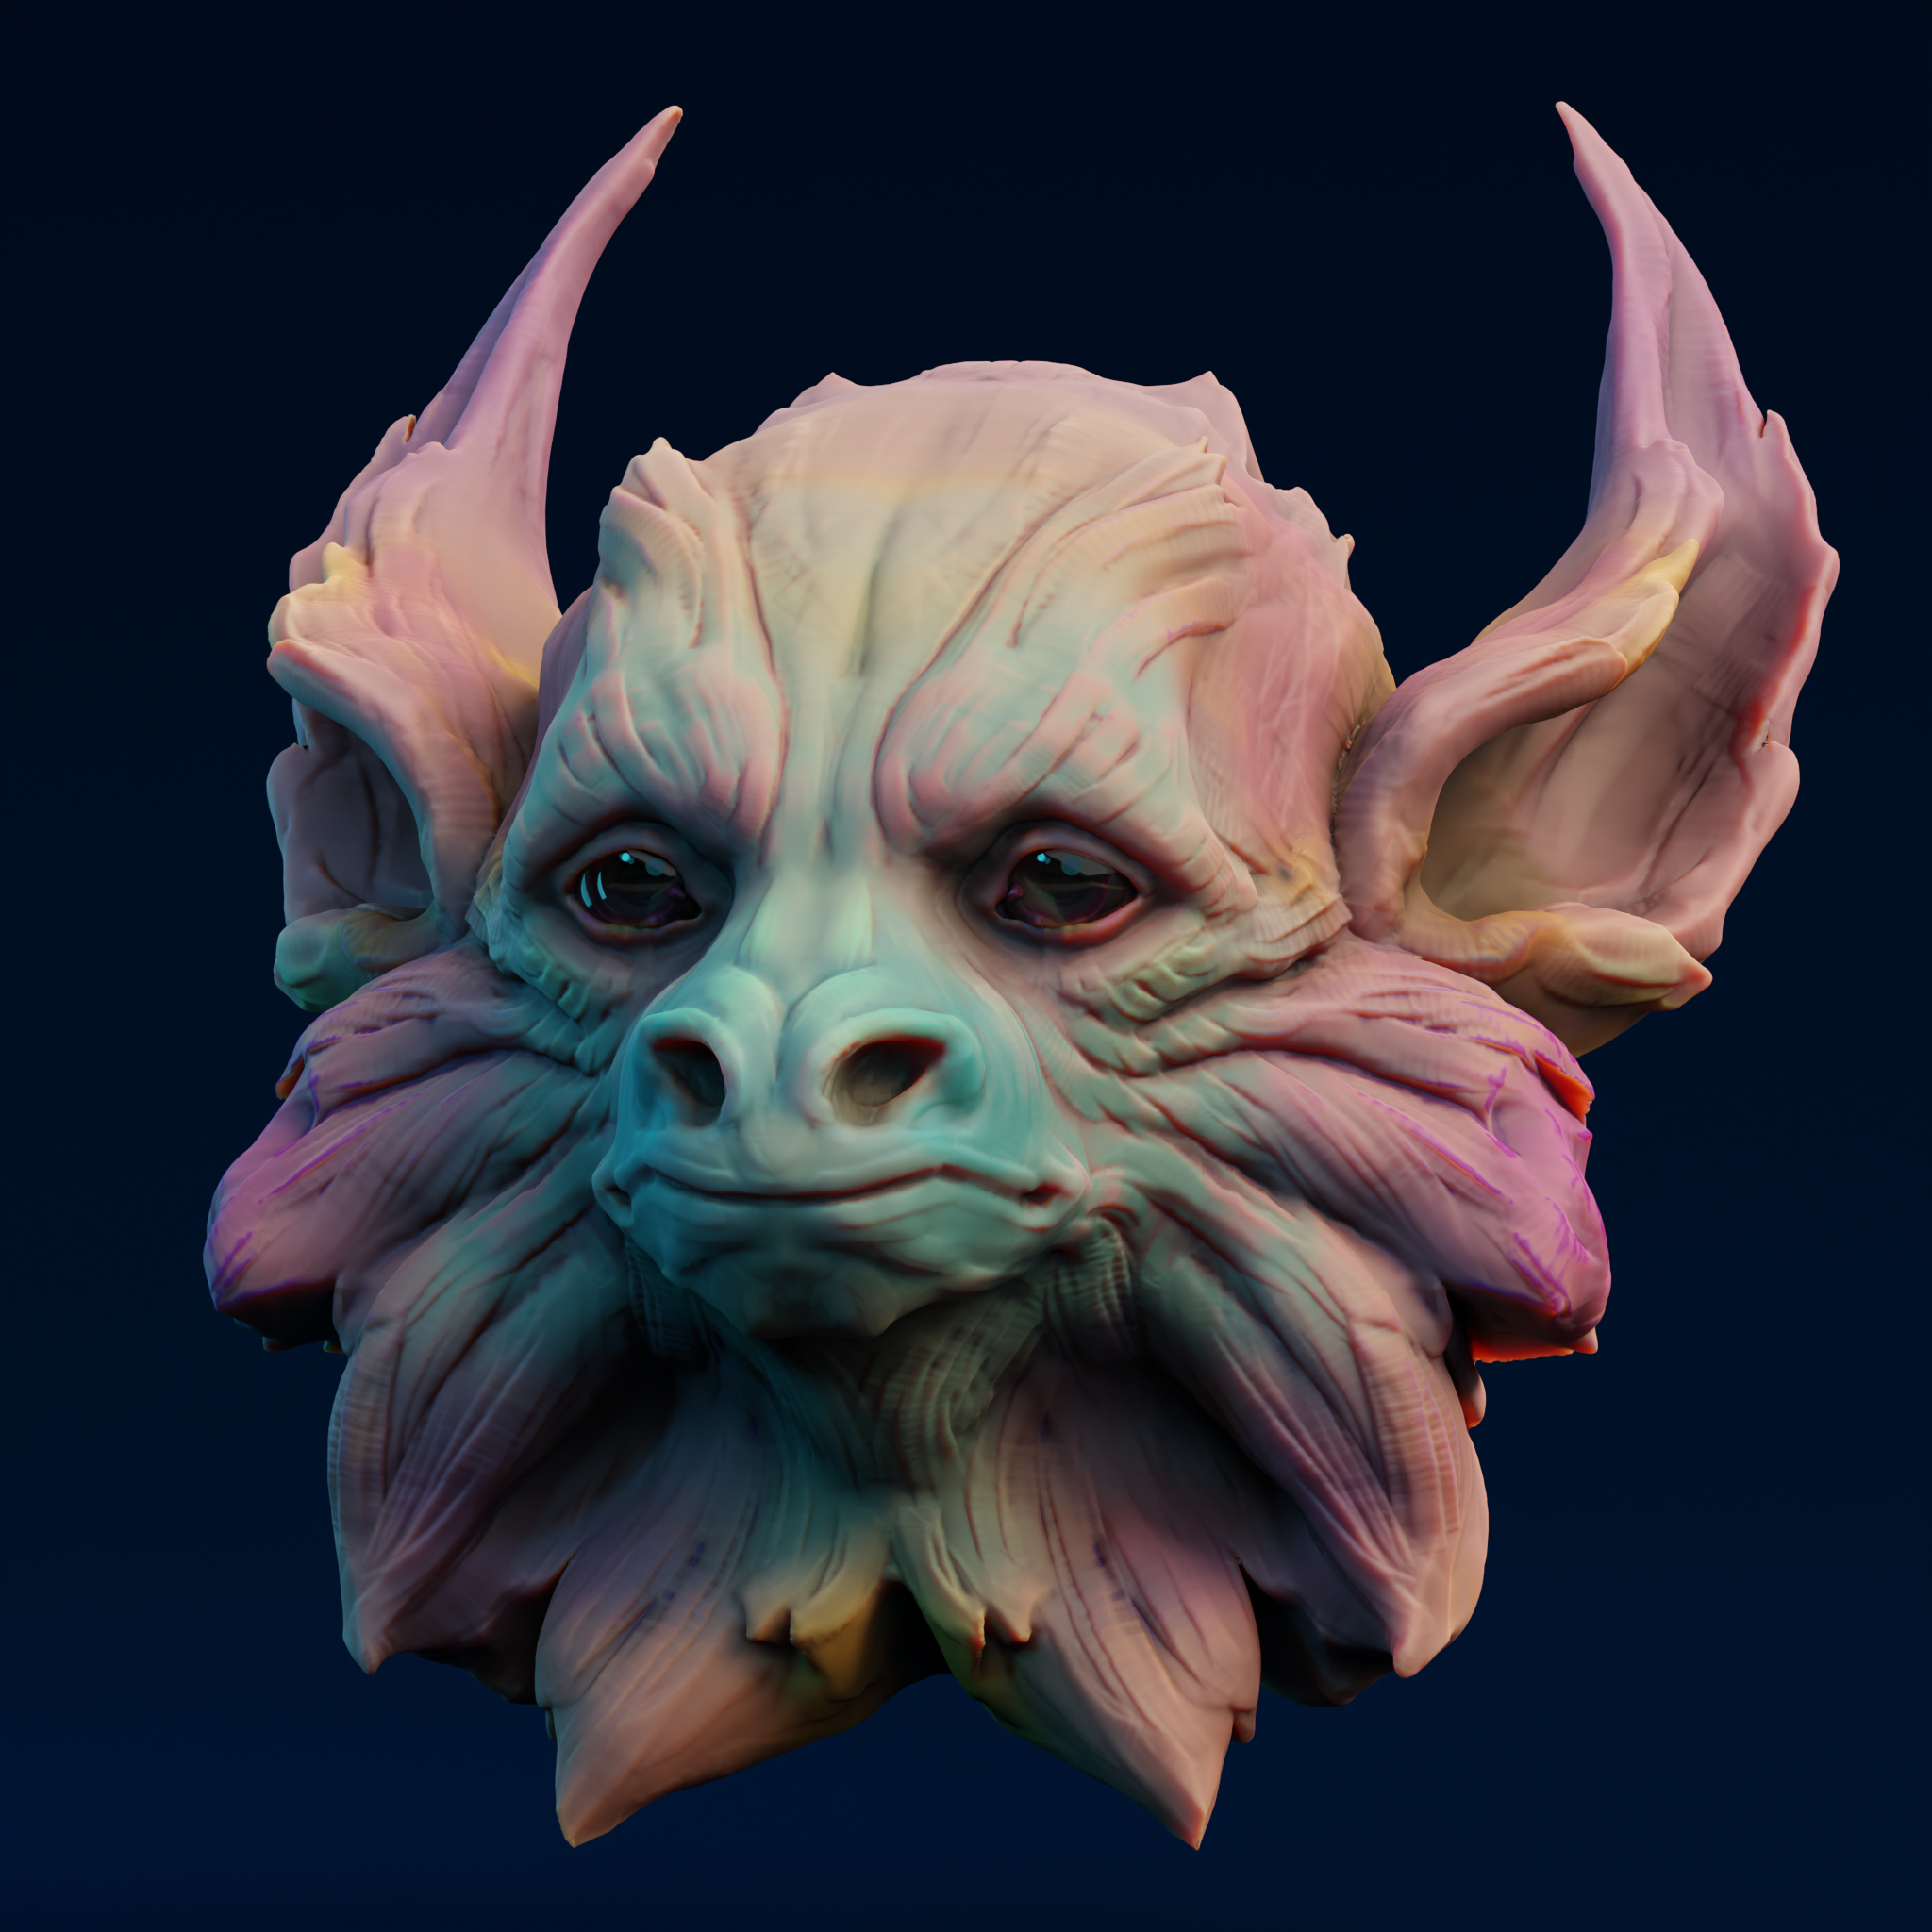

Monke man was an attempt at learning how to sculpt in 3DCoat and get the result into Blender with a multiresolution and a microdisplacement map.
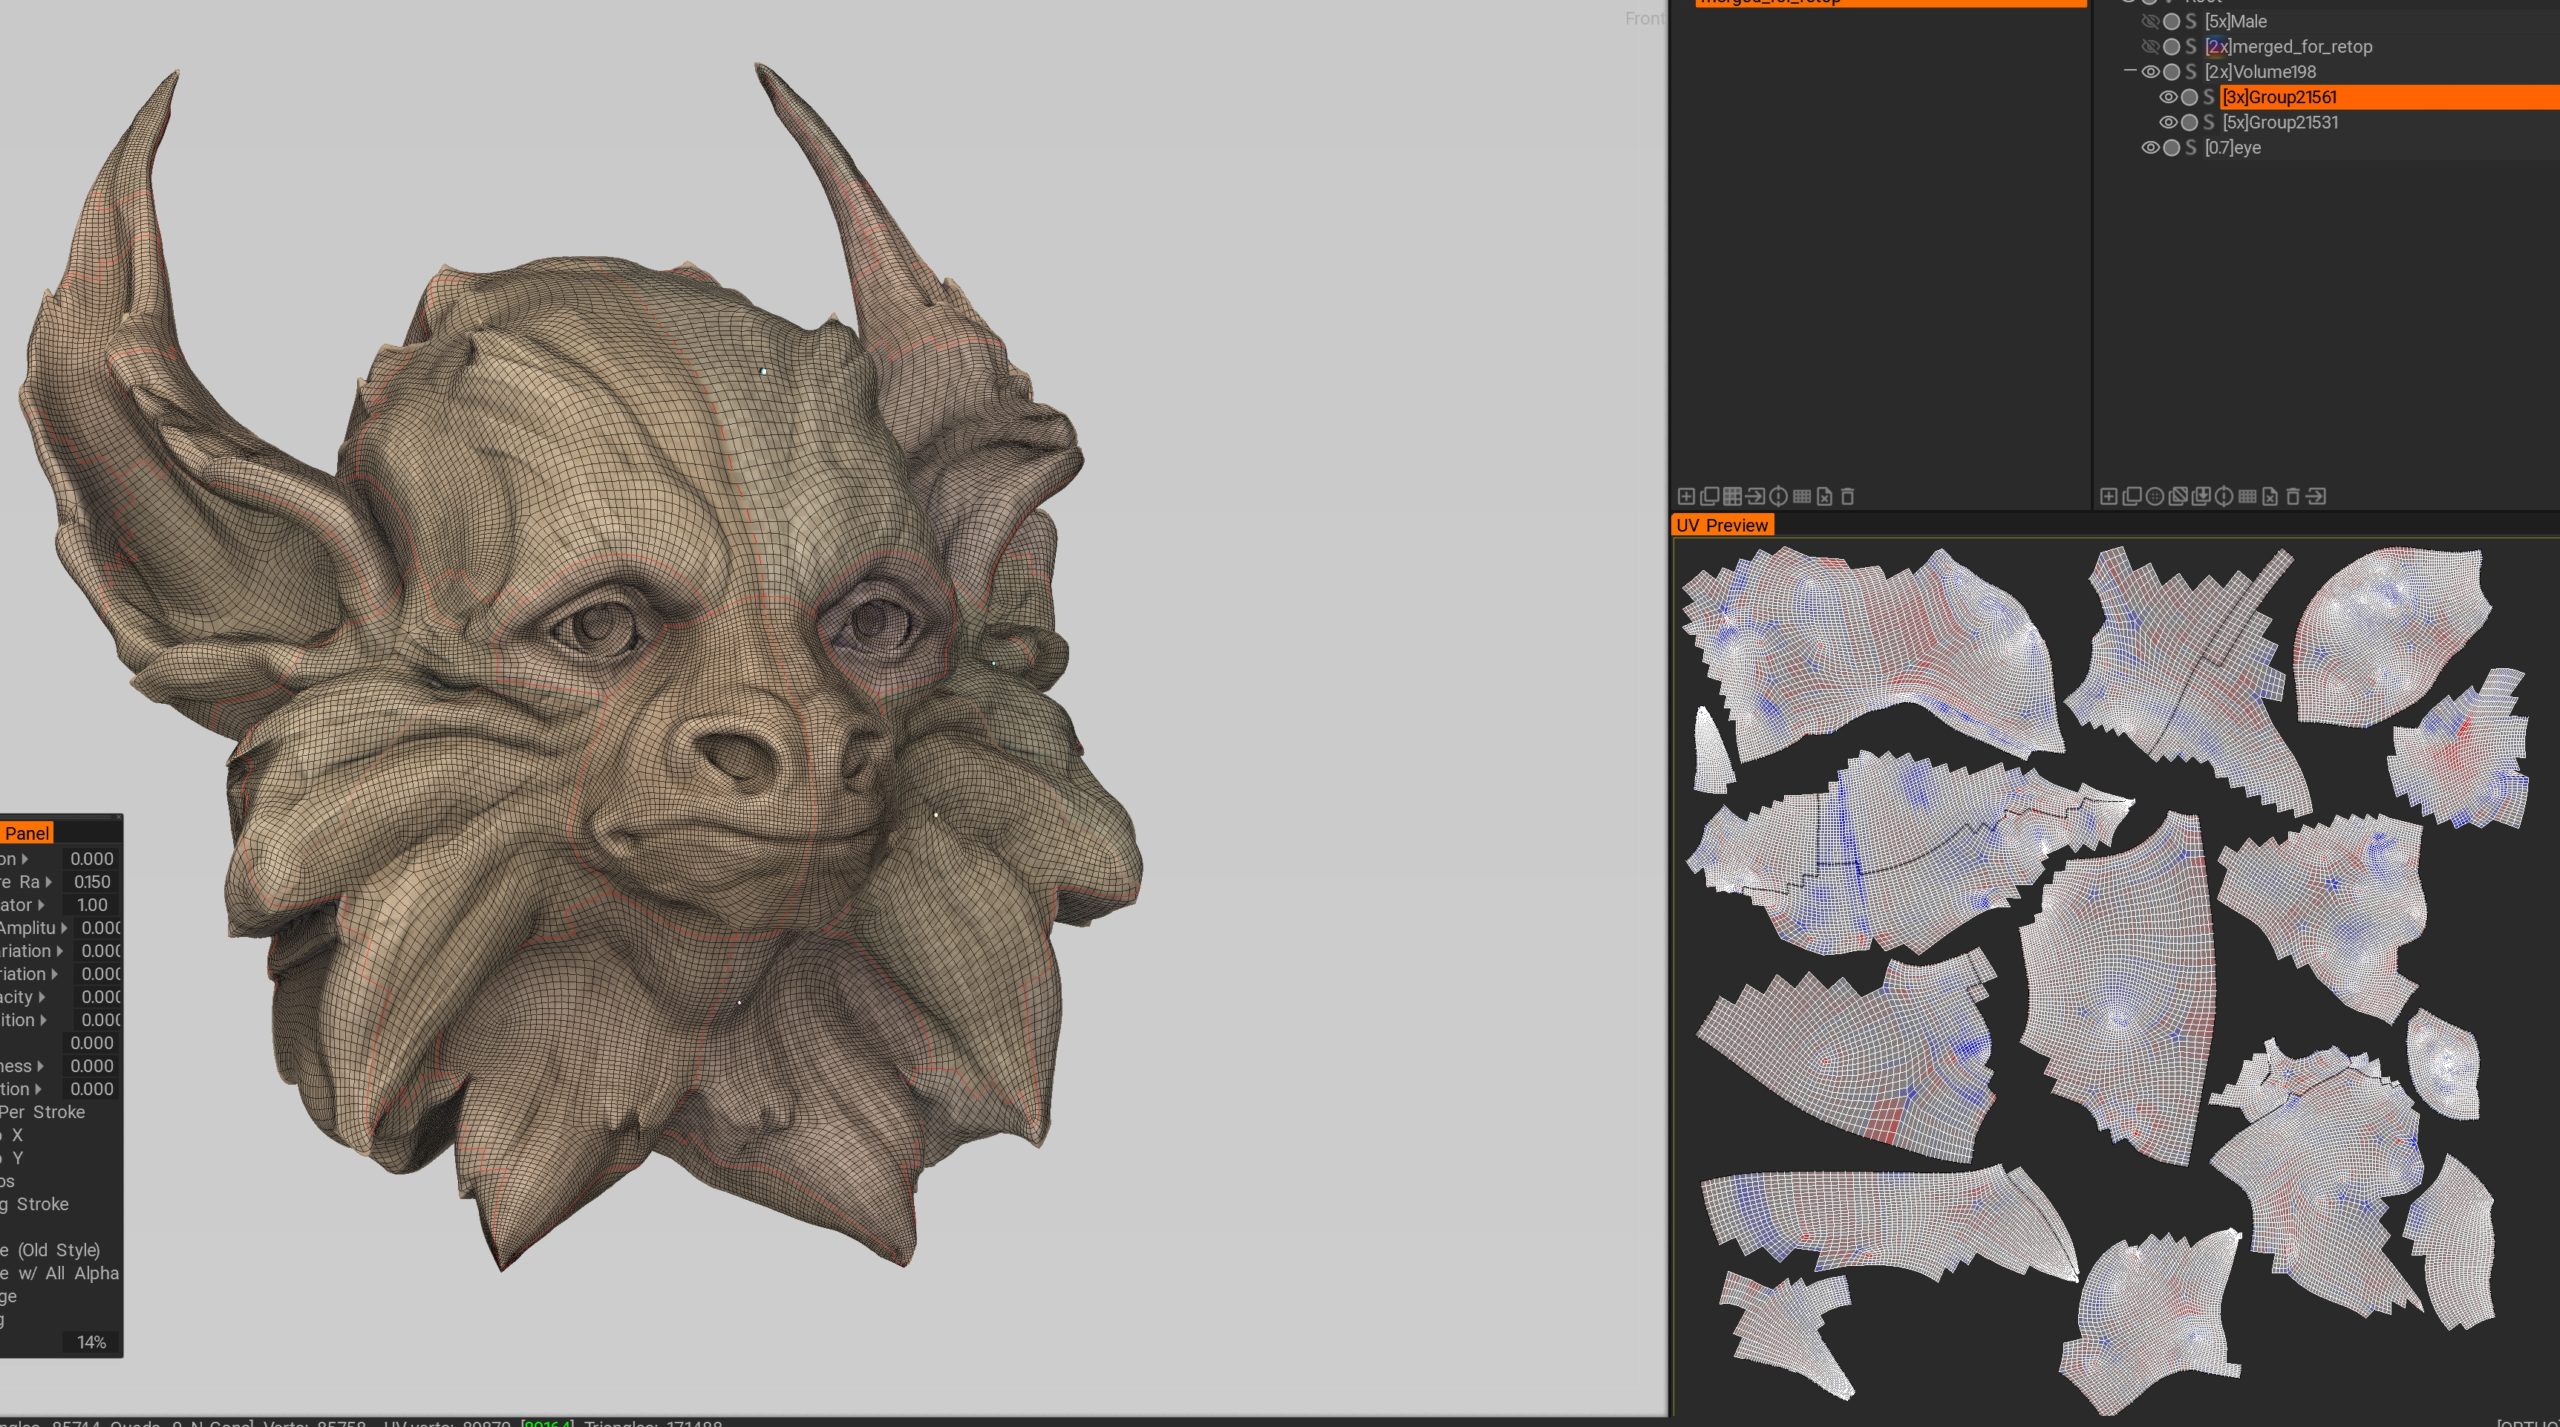
I found that using autopo to a lowpoly, auto or manual unwrap of the generated topo in retopo room, then pre-subdividing + snapping the retopo mesh a few times before baking “microdisplacement” helped a lot with capturing silhouette details.
3DC does not support multires so getting 1:1 from a low to a high in a displacement map is quite difficult, as there is no direct topology correspondence between the bake target and the retopo, so the best is just to presubdivide and snap, and reduce the amount of work the actual displacement texture needs to do. The general idea is that if we presubdivide, we can rebuild a multiresolution modifier from the midpoly in Blender and then use displacement for only small details, hence “microdisplacement”
Sculpt to retopo mesh ready:
- Sculpt your high
- Create a merged voxlayer from visible for retopo so you don’t waste polygons on interior faces
- Autopo your merged voxlayer
- Fuse vertices along centerline (autopo with virtual symmetry often produces small double-verts)
- Disable symmetry, delete one half of the retopo mesh
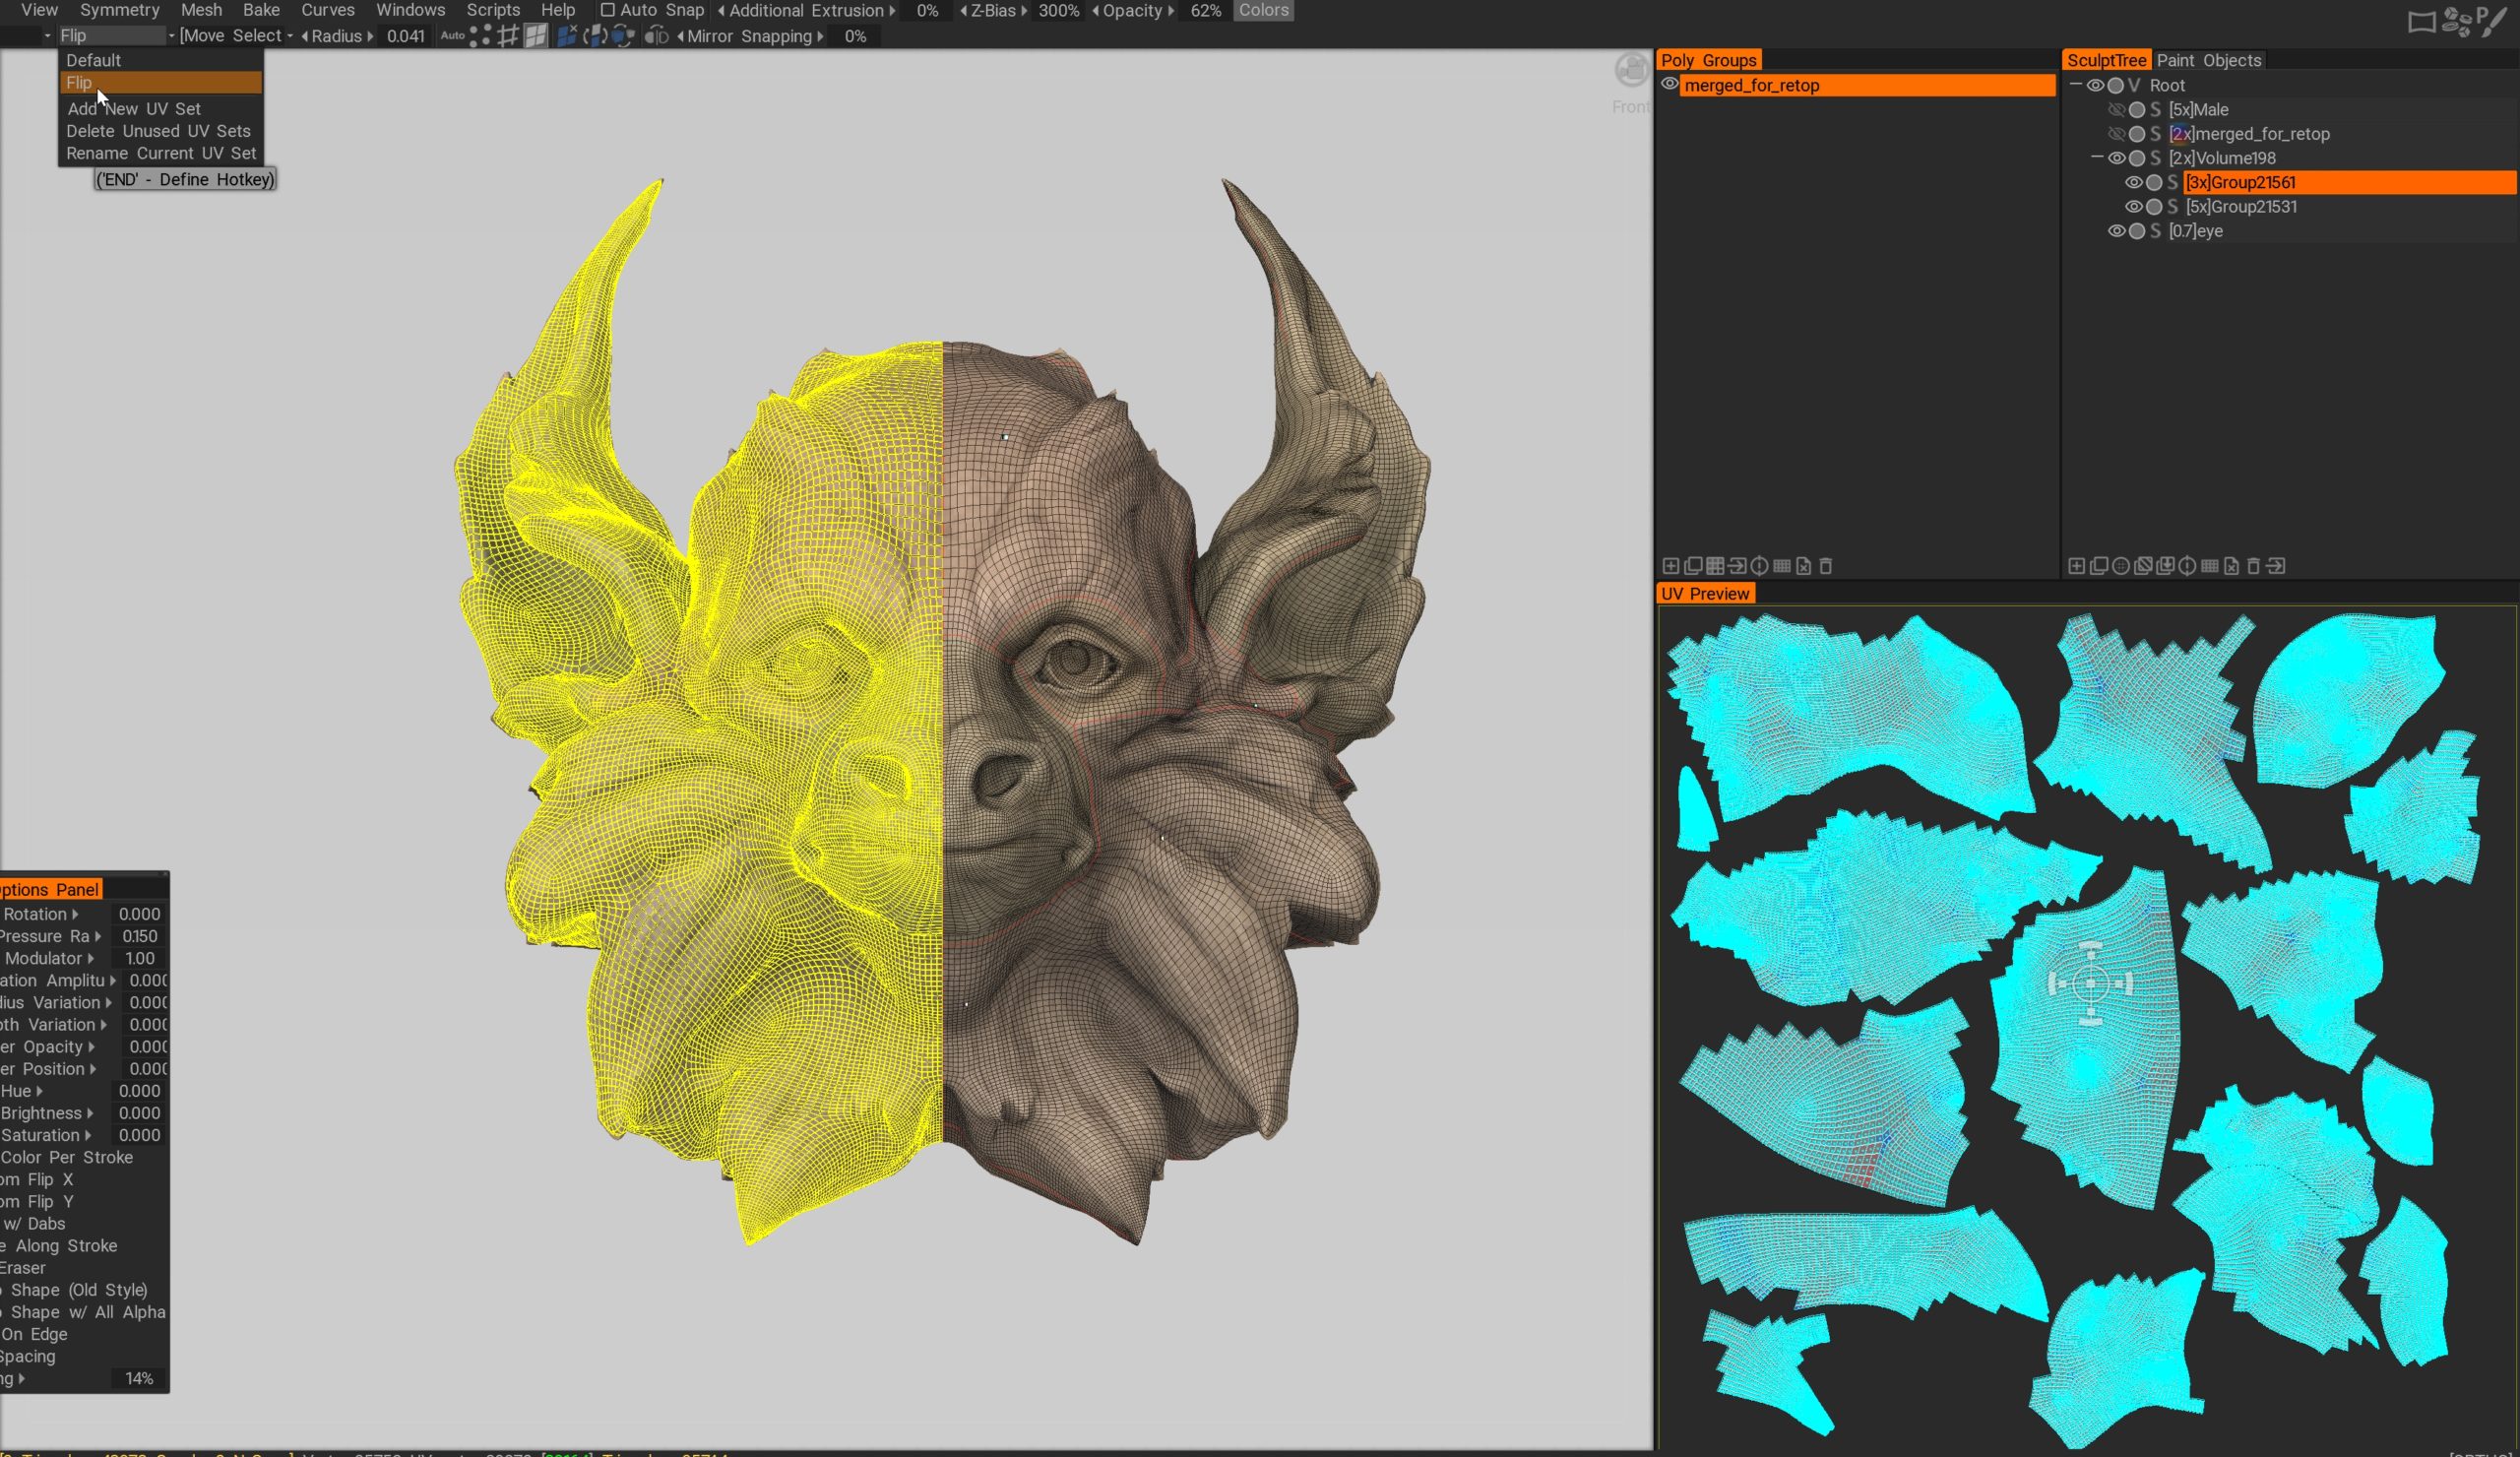
- UV half of the retopo mesh with virtual symmetry re-enabled
A tricky bit when using mirrored uvs, you will get bake errors if the mirrored mesh has overlapping uvs. However, a workaround is to apply symmetry after uving the low, creating a new uv set called “flip”, and moving the uvs on the mirrored half to the flip uv set. This will double the amount of textures that are produced, but they will be identical and the flip material can be discarded or set to a very low resolution. After importing the midpoly into blender, you can just apply a mirror modifier to discard the unnecessary half.
- Apply Symmetry
- Select Half of the mesh
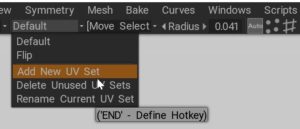
- Create new uvset called “flip”
- Move uvs of symmetrical side to flip uvset
- Subdivide, snap, use brush tool + relax to fix badly snapped areas with virtual symmetry mode on
How you subdivide in the retopo room doesn’t matter — CC or flat subd, as Blender multiresolution will simply rebuild the subdiv from the midpoly, only post-multires subdivs need to be accurate for displacement to work - Rinse + repeat until you have a very closely fitting subdivided Retopo Mesh
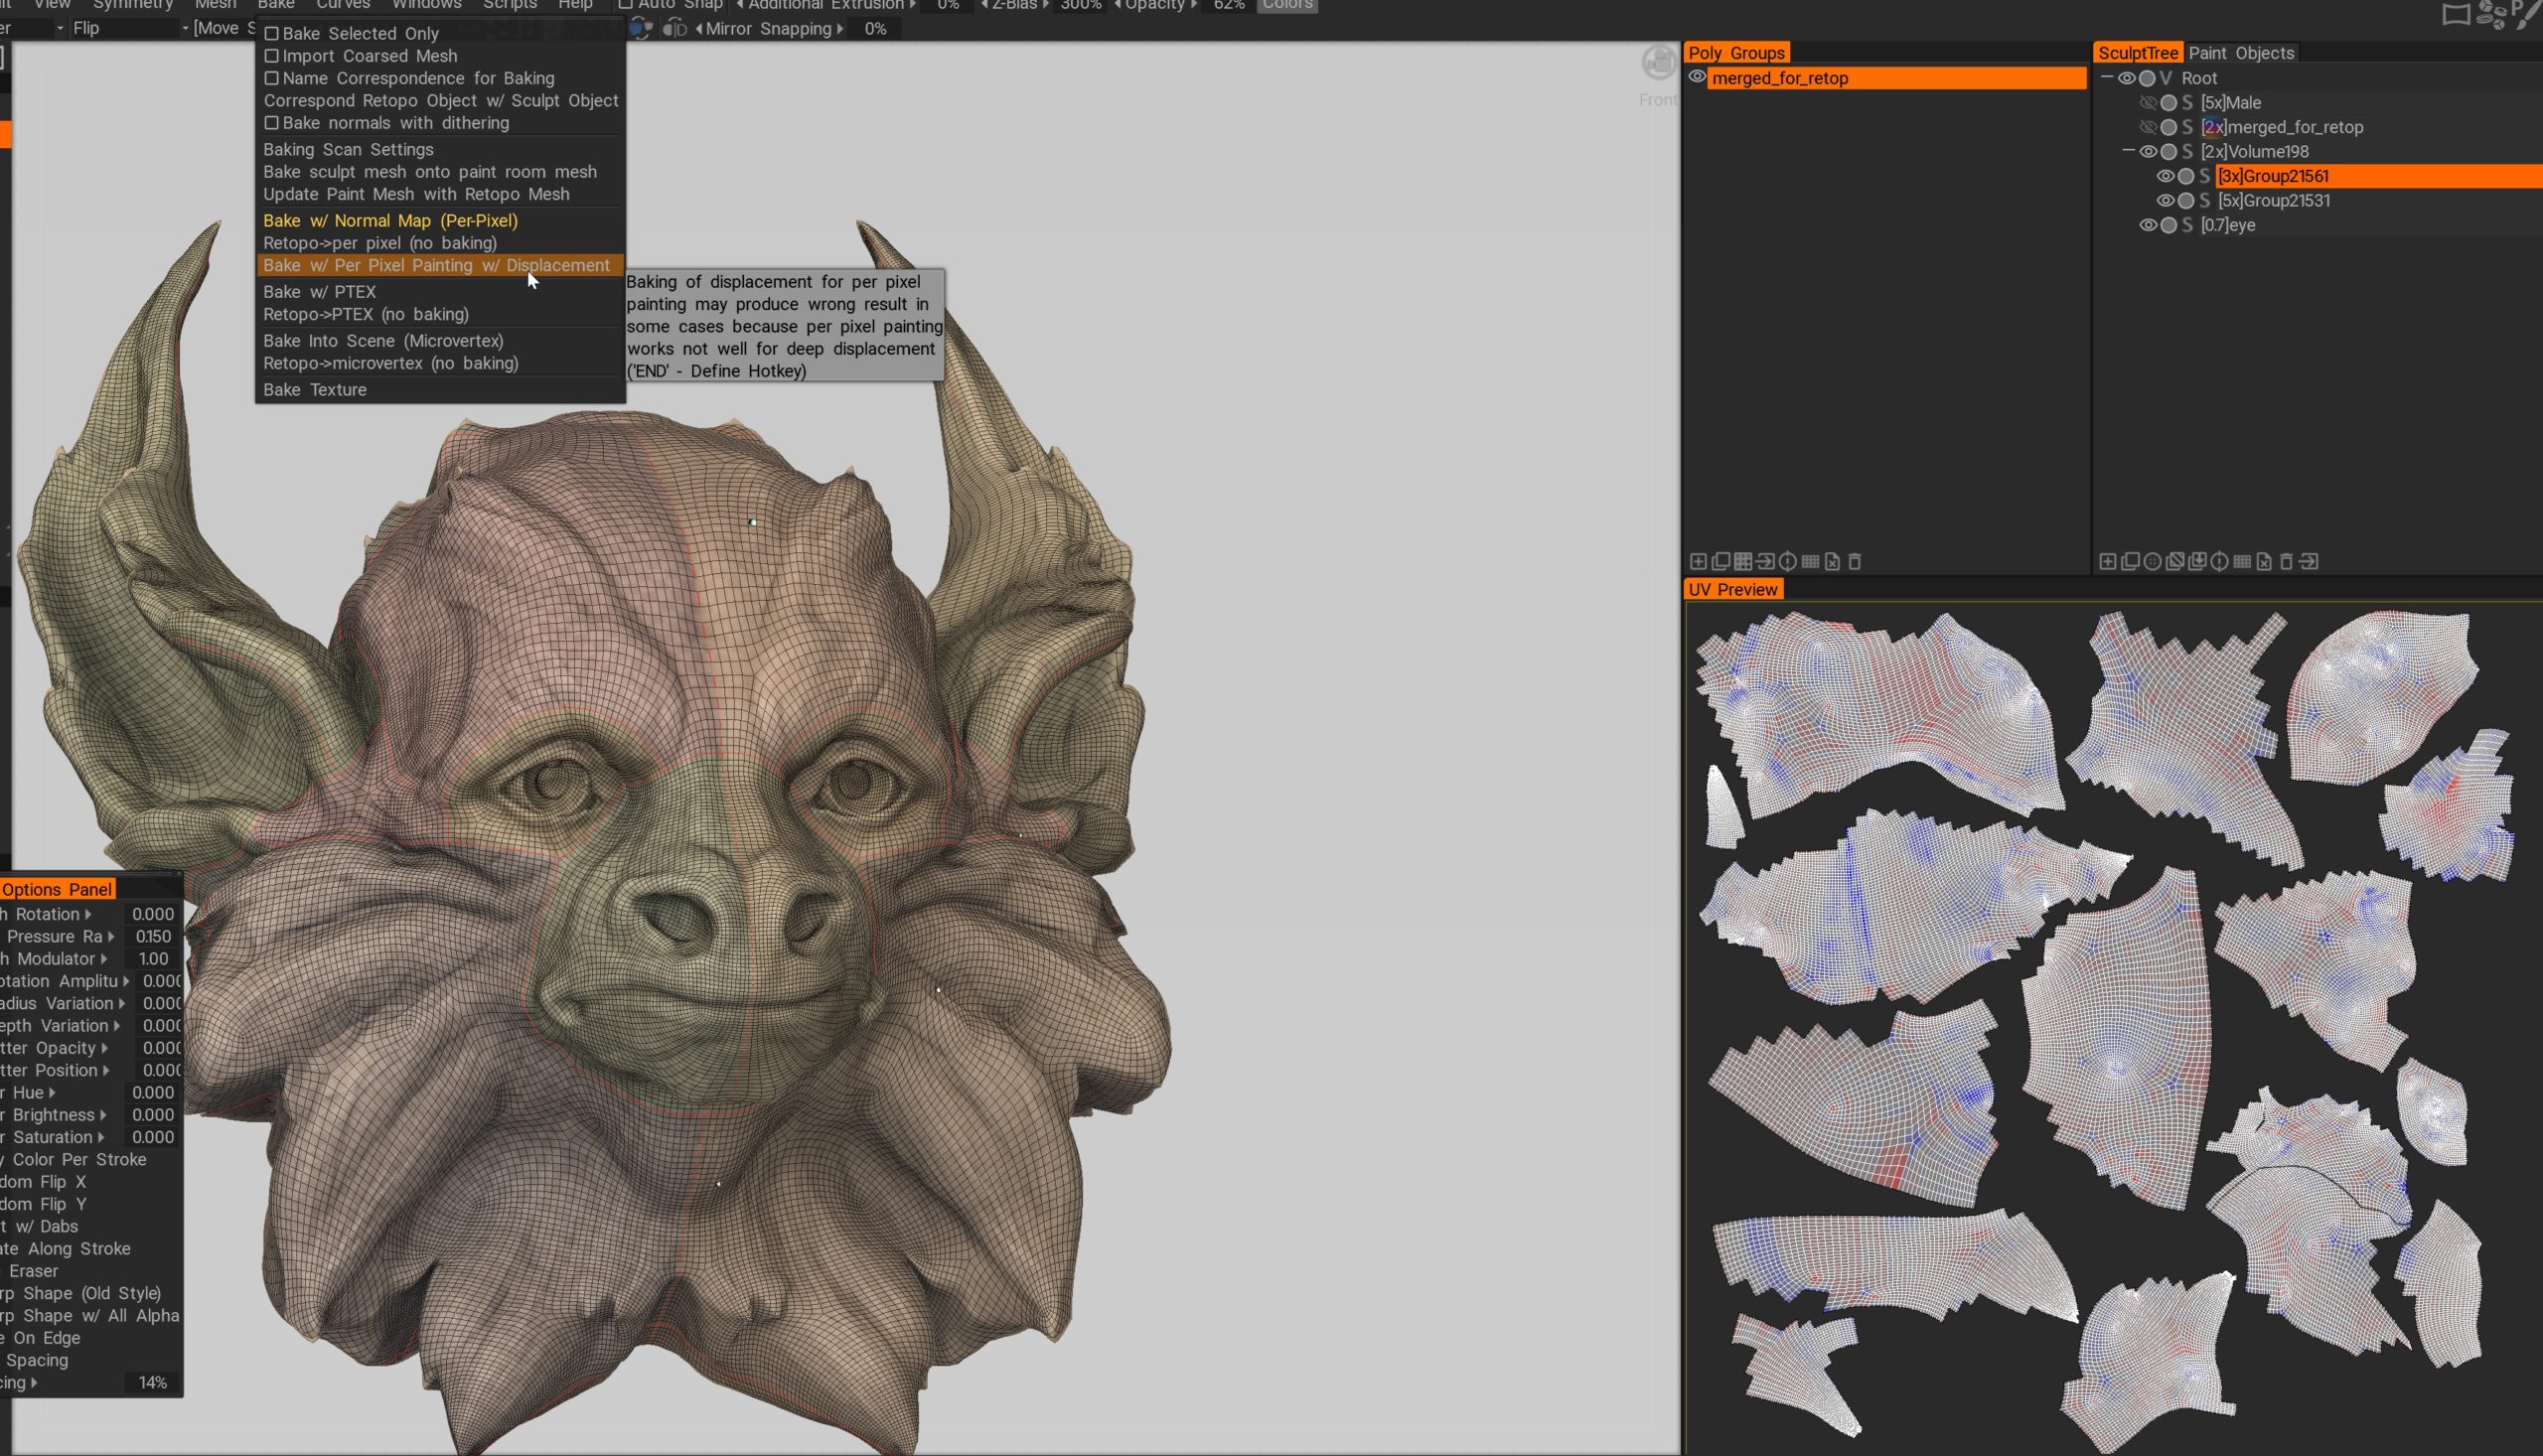
Bake Time
- Ensure all bakes you want have already been performed on the voxlayers.
Once the bake is complete, there is no longer a correspondence between the voxlayers and the microdisplaced paint mesh. As long as you bake AO / Curv / etc on the sculpt objects before retopo room bake, every layer from the sculpt room will be baked to the retopo mesh. However, as I found, the bake result when baking the retopo mesh uses the basemesh and not the displaced mesh as a bake source, resulting in smooth soft bakes that do not represent the details correctly. - Disable virtual mirror snap before exporting to paint room. Virtual mirror will break the subdivision rebuilding in Blender’s multires (center-aligned verts get snapped and no longer represent proper subdivision.
- Use “Bake per pixel with displacement” with voxlayers visible in the vox subtree.
- Paint whatever you want in the paint room
Exporting to Blender
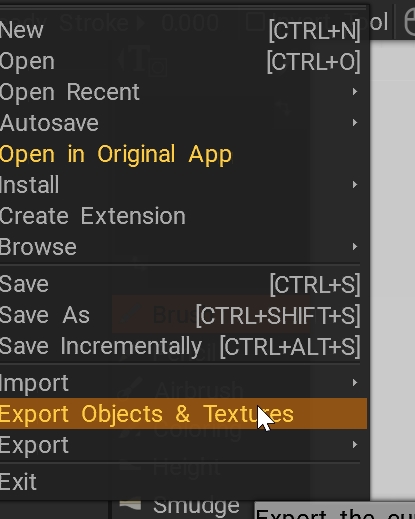
So far I haven’t been able to get AppLink working. I used file -> Export objects and textures and manually imported the FBX into Blender.
- Once imported into Blender, the mesh requires a small amount of post-work. First, import the FBX
- Scale the FBX down to 0.01 if it comes in huge (depends on your blender world settings)
- Delete additional materials, you should have one for either half of the model (Default and Flip in my case). You should also have two UV sets. You can delete “flip”. Add a mirror modifier and apply, ensure the mirror isn’t merging verts along the centerline.
- Add a multiresolution modifier and select “unsubdivide”. This will get you back the mesh from the retopo room before you subdivided it, with the exported mesh as a subdiv level!
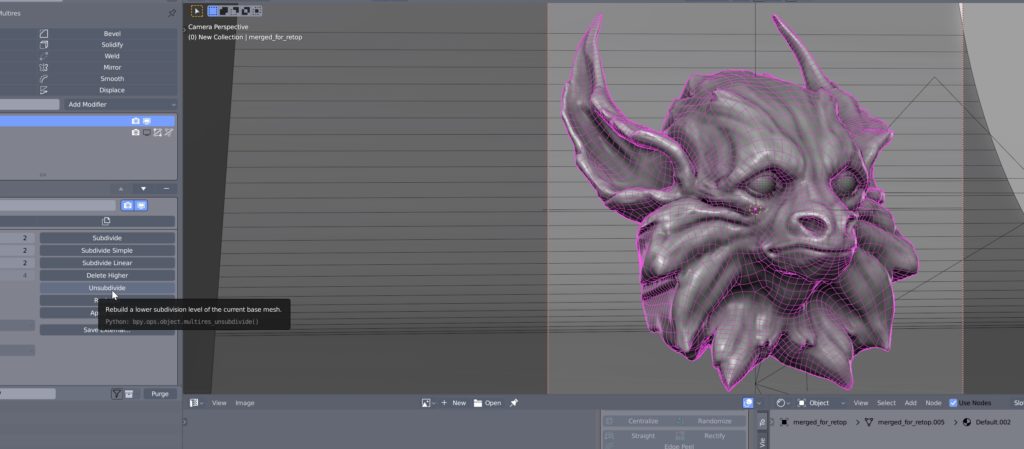
- Add another subdiv modifier after the multiresolution, if you want, set it to adaptive subdivision. This will give the microdisplacement textures additional geometry to work with
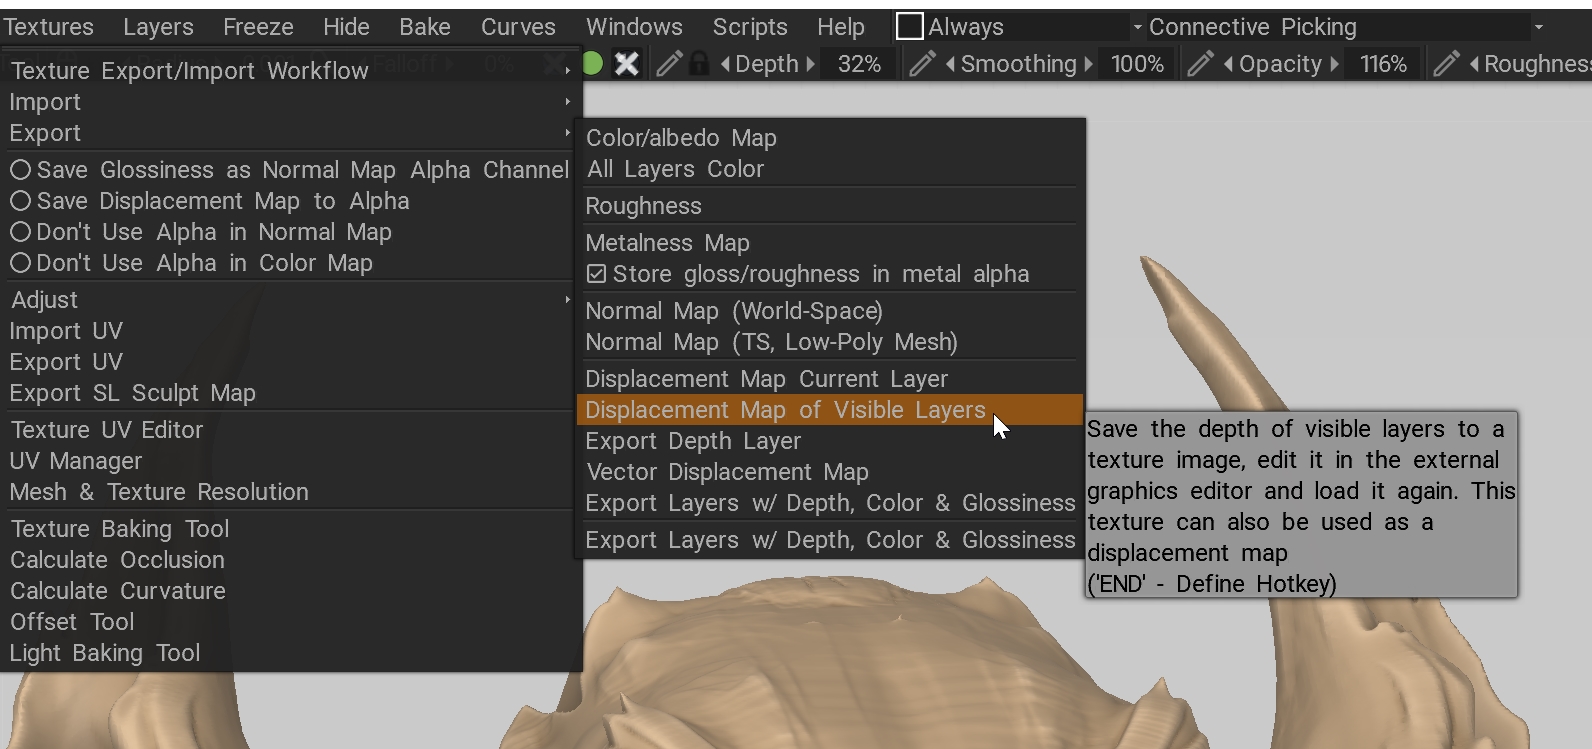
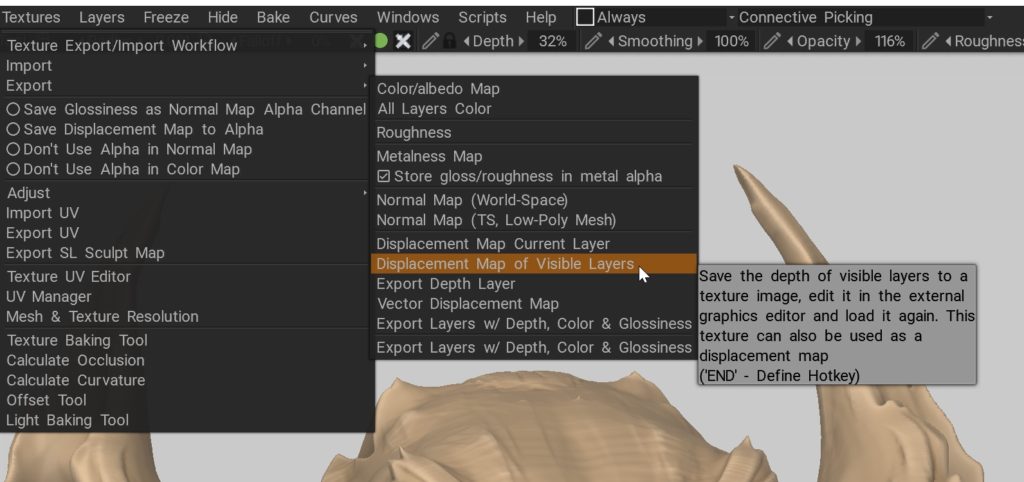
- Assuming you exported a non-normalized EXR, the cycles shader displacement should simply need a scale value of 1. The midpoint by default when using the multitexture exporter is 0.5. Alternatively, you can use Textures – export – displacement map of visible layers. This will allow you to export an EXR whose midpoint is set to zero, plus a dialog will open letting you know what the scale of the texture is. In my case, it was 2.282 or something like that. You can plug this into the cycles displacement scale node, but to be honest I’m not sure setting the value to the dialog box’s number produces correct results. In any case, microdisplacement is only handling small details, but I should look into if it’s actually perfect or just looks mostly alright.
- Light + render in Cycles!